"EXCEPT THE LORD BUILD THE HOUSE, THEY LABOR IN VAIN THAT BUILD IT"......Ps.127:1a
Showing posts with label Crafts. Show all posts

Tuesday, December 11, 2018

Spindle Feathered Tree DIY

I found these cute spindle legs from a table which had these glass claw foot feet.  
I grabbed them at first because I knew hubby would like to use the claw foot for a cane topper. 
 And..... he and my older son did use them on their canes.
Good job guys!
That left me with the spindle legs.  With Christmas crafts on my mind, the thought of a feather tree hit me as I was moving the spindles around in my garage.  I quickly made a base for the trees, screwing it to the spindle..
I had these pieces of greens from a project years ago.
I drilled holes in the spindles, alternating sides to tier the tree.  I then used hot glue and glued them into the spindle.
For the ends I added some Styrofoam balls with wire.
So Prim...
So simple...
So me ....

Thursday, April 19, 2012

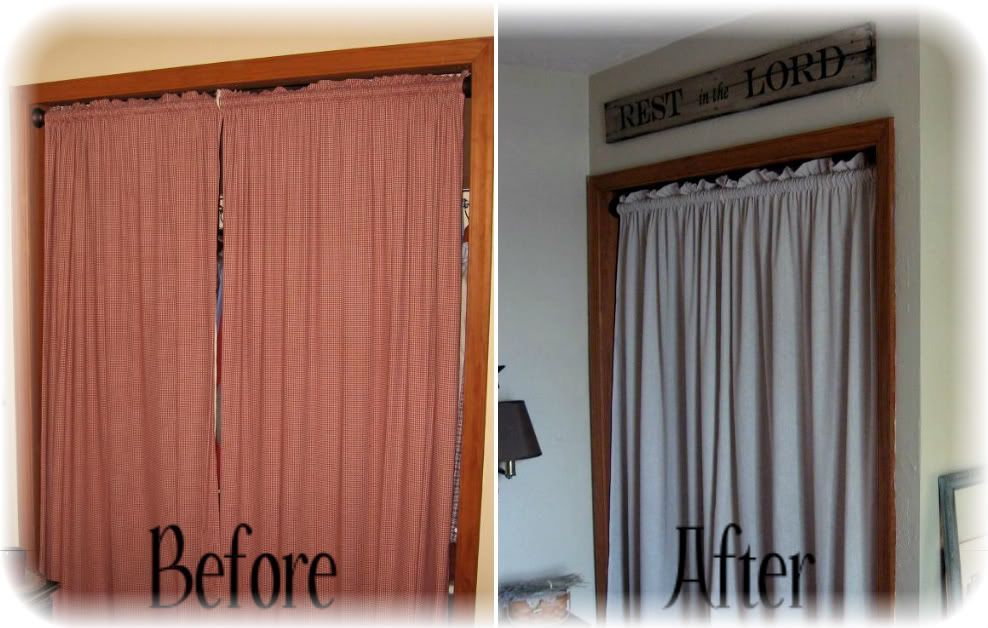
I Made a Sign

We are so close to the end of our school year.  Eight more days to go.
Research papers are soon due.  My house looks like a library threw up--books everywhere!

I am itching to get to the many many projects I have lying around our house and our garage.
One small project was to make a sign for our bedroom.
I wanted a verse that would encourage me.
I came across this one:
"Rest in the Lord and wait patiently for him:...." Ps.37:7
I knew that this would be too long for the board I chose, but the first four words were perfect for me.
I have a huge problem with worry, so I thought this would be a good verse to see when I go to bed after making so many decisions during the day.  It would also be good to remind myself every morning when I start my day.

I used one of the boards from a pallet.
I painted it with my sample paint I had for my walls in our bedroom--a stone color.
I copied the verse in a font I liked--sorry, I can't remember which font.
The words were too big, but that was a good mistake.
I thought I could make the words "in the" smaller and with a different font.
To transfer the lettering I colored on the back of the letters with a charcoal pencil.
I positioned it on the board where I wanted it and then tacked it with some painter's blue tape.
I then traced around the letters like this.
See, I told you I was a visual person.
 This is what it looks like underneath the paper after you trace over the letters.
It transfers the charcoal onto the board.
Using my Sharpie Paint Marker I traced and colored painted in the letters.
I let it dry but not long enough and sanded over the lettering to make it look worn.
I wanted to mention that when I painted the stone color on, I did NOT go all the way to the edges.  I wanted to get that sanded -worn look without actually having to sand like crazy.
I stained it with dark walnut stain to age it.
It is perfect!
I want you all to know that I used a level when hanging my sign.
I hammered in the nails, hung up the sign, and it look crooked.
Apparently the guy who built the closet didn't level off things.
I had to mess with the nails so the sign didn't crooked with the ceiling nor the closet.

I also sewed some new Linen curtains.
I am loving the change in our bedroom.


Any new projects for you?

Linked Up With:


Monday, March 28, 2011

Twiggy Wreath Tutorial

Twiggy Wreath Tutorial

Last year we put new windows in our attic.
Our home was built in 1950, and the old windows were original.
To others they would probably be in the trash.
Not me.  I saw some potential.


My Window was too bare.  I wanted to buy a twiggy wreath to put on it.  They are expensive!  Well for twigs anyway.  I have made grapevine wreaths, so I thought I would try my hand at the twiggy spray wreath.

What you need:

Something for your circle base.  You could use a little sampler hoop like this one.


Using the inside of the hoop only.


You will also need crafting wire, pliers and freshly cut twigs.  I got my branches off of a Snowball bush that needed trimmed.


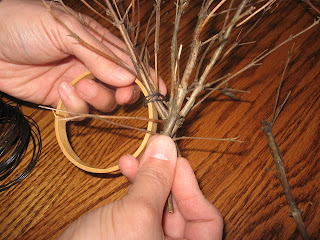
Next, trim the desired twigs off of your branch, and connect the twigs to the circle base using your crafting wire.


*Try to cover the front of your base with the twigs.  I was re staging what I did back in the Fall and I wasn't careful enough to cover this base...sorry.*

Repeat this step and keep overlapping the twigs securing them each time.


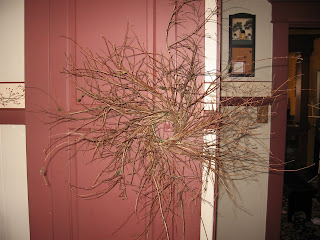
The end result:


Go save yourself some money! 

For the Window:

~I had to remove the glass from the window carefully.

~Next, I sanded the old paint, being careful because of the lead paint that was most likely on the window.

~After sanding the window, I painted it with acrylic paint using a brush.
Pecan is the color I used.

~I let the paint dry completely before staining.   
I used Min-wax walnut color stain.
Wearing rubber gloves and being in a well ventilated area, I applied the stain with a brush and let the stain soak in for a good 2 min before wiping the stain off with a dry rag.  I like the primitive look, so I don't like to wipe off too much of the stain....esp. around the crevices.  It gives it that old look with the dark stain in them.
The more dings, the more character the stain brings out.

Thanks for visiting!  I hope you enjoyed it!

Friday, December 10, 2010

I Love Quilting!


I've been busy this last week.  I was trying to fill an order for a friend.  I was piecing and quilting a runner.  I like to tea dye or coffee stain my quilts to give them an aged look.

After I finished that runner, I had to make a snowman felt runner also.  I really enjoy doing this kind of crafting. 
I love it that I can watch a movie in the evening and quilt.  Makes me feel like I am not wasting my time.
They are finished. Now I still need to work on some Christmas presents.  Time is flying.  There never seems to be much of that around--Time.

Tuesday, November 9, 2010

Taking a Breather

This week Dan's parents are here.  Dad is working on the attic, and mom is keeping me company. 

 Since I have my craft sale during the week of Thanksgiving, I don't do any baking.  This week gives me a little breather from the intensity of crafting.  It also gives me a good excuse to bake.  Today Miles and I made apple pie and pumpkin pie for dessert tonight. 


They are so yummy!

Even though I am not focusing on my crafts this week.  I do have a goal of making penny rugs out of felt I bought at Joanne's.  I've never done this before, but I found a blog that shows you how to make them.  http://pennyrugsandmore.blogspot.com  I am going to try it.  I used her idea of using freezer paper to draw on before cutting out my circles. 


 Miles helped take the paper off and count them for me.


 Then I bagged each project to keep them organized.


I am slowly sewing them together, using the blanket stitch.  


I have one pack stacked.


This is how I am going to sew this group together.


My Mother-in-law is very good at knitting and crocheting.  She was working on snowflakes while I worked on the penny piles for my penny rugs.


It has been a nice break.  The attic is starting to come together.  Yippee!!

Wednesday, November 3, 2010

Homemade Treasures

I love those days at home where everyone is doing their own projects.  This past Saturday was like that. Bethany and Wilson were working at different people's homes doing odd jobs to raise money to be able to go on a youth trip to Empowered Youth.  Harrison and Miles were the only ones here.  Dan and I were building some benches out of the old steps that were in our attic.  Miles and Harrison were outside trimming a bush in our yard.  I had plans for those branches they were cutting and sawing down.  I didn't know that Harrison also had plans for the scraps of branches piling up in the yard.
When we were finished, Dan went on a bike ride.  I asked if the boys would help me take off the leaves of the branches because I wanted to make a twig wreath.  They are so sweet.  They willingly helped me do my craft.  Then Harrison asked if he could have the rest of the branches.  I didn't care.  It was garbage to me now.  I was so into what I was doing that I didn't realize what the boys were doing.  
So while I was making this:


They were building this:


Like I said in an older post, my children make the best of what we have.  I think this does come from me a little.  You see I love to make something new from something old.
The old steps in our attic turned into these:


This is what I've looked like for the past month.  I'm glad you didn't just stop in:)


I also wanted to use the old windows that were in our attic.


Do you think I should do something else to them?  I'm at a mental block.

Some may think my things are just junk.
My boys think this is the best fort ever.  I think it looks like a bunch of beavers moved into our yard.
I guess we all have our little treasures.