"EXCEPT THE LORD BUILD THE HOUSE, THEY LABOR IN VAIN THAT BUILD IT"......Ps.127:1a
Showing posts with label Reupholstery. Show all posts

Friday, August 22, 2014

Second Reupholstered Chair Finished

Hubby and I bought these recliners about a year and a half ago.  As you can see the leather has peeled horrifically from both chairs.  The one chair's spring has sprung out of place.  I was very frustrated and sad to know we paid full price for junk.
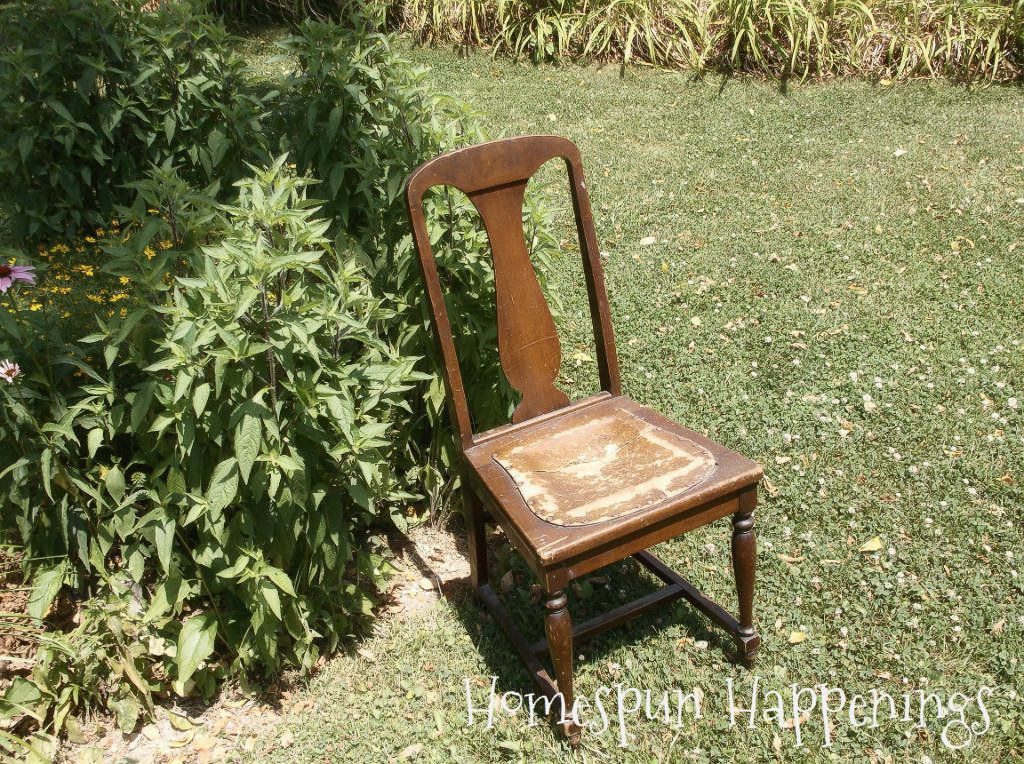
 In comes this $5 yard sale beauty.
I decided to try to recover this with two $10 drop clothes instead of paying $170 for two recliner slip covers.  I am glad I did!
You can definitely tell I am a beginner, but I would so much rather look at my primitive craftsmanship over the painful site of that torn leather.  This chair has replaced the one recliner whose spring had sprung.  My boys tore it apart, and we kept some remnants to reuse.  They have crafted some bags, a cover for a knife, and notebook covers out of the leftover material.
 Ah, so refreshing to see!  I love that wood!
And...
For only $25!
Here are the items that the boys crafted:

Sunday, August 17, 2014

My Second Re Upholstered Chair in the Making

I got a little side tracked with crafts. I found this chair at a yard sale yesterday.  It had good springs and seemed very firm. It also had no odor whatsoever. I thought for $5, I could recover that and have a new solid chair. I bought some recliners from a store a year and a half ago; they are peeling, and the one chair's spring has already popped! :(
 I just love all that wood!
I removed all the fabric which took forever. My hand is still hurting!  Whoever covered it before used a lot of staples! I took lots of pictures so that I know how to put Humpty Dumpty together again.
I sanded down the wood and used a dark walnut stain.
I just love the darker stain, plus it is going to really pop when I cover it with a drop cloth.
Looking forward to finishing it up!
That's one thing about a project in my house, I feel like I am a crazy woman until it is finished. Unlike crafts...they keep getting put off.

School is beginning this week!  Yay!  Back to a schedule!

Tuesday, August 13, 2013

My First Upholstered Wing Chair

I made my first slip cover back in June, and I wasn't really happy with the look of a slipcover.  I really wanted the chair to be reupholstered.  I like the fitted look on furniture.  I knew I had two of these chairs, so I wasn't so nervous about ruining the chair.  However I wanted to use as much of the drop cloth and piping from the slipcover I had made, so that I wasn't putting anymore money into a project I was going to be experimenting with.  As much as I wasn't thrilled with the slipcover, I did like it better than my torn and dirty looking wing chair.
So I spent a day tearing apart my slipcover in hopes that this was not all in vain.  I was able to use almost all the pieces from the slipcover.  I had to recover the wing part by itself and make that two separate pieces at the arm.  I am glad I did the slipcover and had those tips from Miss Mustard Seed's Videos.  I was definitely more relaxed from having that experience.  
I am not going to do a step by step tutorial.  I am just going to show you different pics.  On the left you can see how the wing and the arm are two different pieces.  I just folded the fabric under and stretched and stapled it.
When it came to the back of the chair, I did not have the cardboard thingy that they used.  It was not able to be used again, so I came up with my own template.  I explain it in the photo below.
I did reuse the metal clips the factory had used.  I also reused the hardboard template they had in the arm front.  So sorry for my layman terms.  I am not a professional and have no idea what I am talking about with all of these pieces.  
Here is a pic of the slipcover I did back in June vs. the upholstered chair.  I personally would reupholster before I made a slip cover.  Once you tear things apart and see how it is put together, it really isn't hard.  There is a lot less sewing involved!  I love that part!  I am not even sure if I would have had to sew if my wings were like some of the wing chairs I saw on the videos I watched.  Again I am so thankful for making that slipcover so that I had a clue with what to do with the wing part.
I love it!

Thursday, August 8, 2013

Guinea Pig

I am a little nervous to even post about this.  I am in the middle of reupholstering my other wing chair.  I am not making a slip cover, I am tearing it apart and recovering it.
 So far this chair is not like the video I was watching, so I am about ready just to go on my own instinct.  I am thinking that may not be a good thing to go by since I have never done a wing chair before.  
When I tore apart the wings, the sides, the arms and the wings were all one piece.  I am going to try cover it a different way and hope it looks good :)
So this is what is staring at me today.  
I am going to use drop cloth so there is no major money going into my guinea pig of an idea.  
Hubby is routing for me.  
What a pal!
So hopefully I will have a completed--good looking wing chair to share with you next week!  I will even share with you my failure of a chair if need be....

Monday, June 10, 2013

A New Linen Look and a Tip for Making Your Own Piping

Remember these?
The one chair was a roadside find, and the other was my craft chair.
I am gearing up for some slip covering, but I thought I would try a little reupholstering.  I used a 7 oz. canvas drop cloth.
For this chair back, it was not worth taking out the back vinyl part, so I painted it with AS French Linen.
I then did a white wash over the linen.
For the front of the chairback, I used the old vinyl as a template and then stapled it inside over the existing foam pad. 
I then stapled some batting and drop cloth over the foam on the chair's seat.
Making sure to stretch opposite sides and corners.
For the piping I bought a $1.50 clothesline.
I measured around the edges.
Tore a 2 in. canvas strip, wrapped it around the clothesline, and with a zipper presser foot I sewed and made the piping.
I attached the piping with a staple gun to the bottom of the upholstered seat.
I also stuffed it in along the edge of the chair back and glued it.
They turned out wonderful.
I wanted to make it look like old linen, so using some frog tape and watered down acrylic paints; I made some "linen" stripes.
After it was dried, I ironed over the paint to help it stay in the fabric.
I love them!
Ms. vanity sold at my sale this past weekend, but the lady didn't want a chair.
I really thought either chair would have worked well with her.