"EXCEPT THE LORD BUILD THE HOUSE, THEY LABOR IN VAIN THAT BUILD IT"......Ps.127:1a
Showing posts with label furniture. Show all posts

Thursday, August 15, 2013

What a Find!

We have not yet started school this year, which is late for me.  I have yet to purchase all of the school books.  I hope to do this Monday and hopefully start school at the beginning of September.  The kiddos are loving it.  I am loving this fall-like weather we have had for the past two weeks.  I am trying to get a jump on some of my roadside finds.  
I found this end table recently.  This is a pic of it after I cleaned it and my son sanded it.  I actually had started to stain the top when I took this pic.
End tables like these sell at our Amish markets for no less than $125.00.
I stained the top with dark walnut.  I also used Clear and Jacobean wax on the top.
I painted the bottom in Annie Sloan's French Linen and then waxed it with clear and dark wax.
This one is a keeper.  It is going in hubby's office.  
He also wants me to paint the other wing chair in French Linen.
I painted a swatch to see if he would like it.  He would rather me paint the chair than reupholster it.  
Hmmm..... This will be interesting.

Tuesday, August 13, 2013

My First Upholstered Wing Chair

I made my first slip cover back in June, and I wasn't really happy with the look of a slipcover.  I really wanted the chair to be reupholstered.  I like the fitted look on furniture.  I knew I had two of these chairs, so I wasn't so nervous about ruining the chair.  However I wanted to use as much of the drop cloth and piping from the slipcover I had made, so that I wasn't putting anymore money into a project I was going to be experimenting with.  As much as I wasn't thrilled with the slipcover, I did like it better than my torn and dirty looking wing chair.
So I spent a day tearing apart my slipcover in hopes that this was not all in vain.  I was able to use almost all the pieces from the slipcover.  I had to recover the wing part by itself and make that two separate pieces at the arm.  I am glad I did the slipcover and had those tips from Miss Mustard Seed's Videos.  I was definitely more relaxed from having that experience.  
I am not going to do a step by step tutorial.  I am just going to show you different pics.  On the left you can see how the wing and the arm are two different pieces.  I just folded the fabric under and stretched and stapled it.
When it came to the back of the chair, I did not have the cardboard thingy that they used.  It was not able to be used again, so I came up with my own template.  I explain it in the photo below.
I did reuse the metal clips the factory had used.  I also reused the hardboard template they had in the arm front.  So sorry for my layman terms.  I am not a professional and have no idea what I am talking about with all of these pieces.  
Here is a pic of the slipcover I did back in June vs. the upholstered chair.  I personally would reupholster before I made a slip cover.  Once you tear things apart and see how it is put together, it really isn't hard.  There is a lot less sewing involved!  I love that part!  I am not even sure if I would have had to sew if my wings were like some of the wing chairs I saw on the videos I watched.  Again I am so thankful for making that slipcover so that I had a clue with what to do with the wing part.
I love it!

Thursday, August 8, 2013

Guinea Pig

I am a little nervous to even post about this.  I am in the middle of reupholstering my other wing chair.  I am not making a slip cover, I am tearing it apart and recovering it.
 So far this chair is not like the video I was watching, so I am about ready just to go on my own instinct.  I am thinking that may not be a good thing to go by since I have never done a wing chair before.  
When I tore apart the wings, the sides, the arms and the wings were all one piece.  I am going to try cover it a different way and hope it looks good :)
So this is what is staring at me today.  
I am going to use drop cloth so there is no major money going into my guinea pig of an idea.  
Hubby is routing for me.  
What a pal!
So hopefully I will have a completed--good looking wing chair to share with you next week!  I will even share with you my failure of a chair if need be....

Monday, August 5, 2013

A Nice Visual

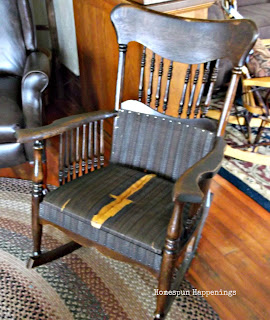
My former Pastor and his wife are getting ready to step out and be an Evangelist.  They were having a yard sale to literally get rid of almost everything they owned.  One of the items was this rocking chair that I believe was his father's.  The price was right, and I knew I could recover it.
 I really like the size of this rocker.  It is really comfortable to sit on.  
My son and I began to remove the old vinyl that it was covered with.
I stapled some batting to the bottom ledge before covering the rocker with drop cloth. 

Using the hem of the drop cloth I covered the staples.
I glued the hem strip in place with a hot glue gun.
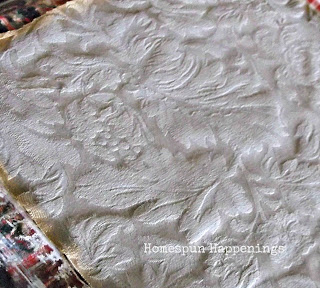
For some reason I had a real hard time capturing the color of the dropcloth on the picture of the rocker.  It looks like the oatmeal color on the close-up shots to the right.
Now I have a nice visual to remember to pray for them on this new journey in their life.

Monday, July 29, 2013

Headboard Made from a Door

      Well, I finally did it!
After a year of holding onto a door that I found along side the road, I finally made a head board for my oldest son.  I can't actually say that I made it.  I designed it, and he cut it and nailed it together.
...I painted it :)

So I started with a full length wood door.  I really can't believe someone threw it away.  My son cut off the top panel of the door.  He then cut another inch and a half off of each end.  I was pretty impressed at how straight he cut it.
We took some old trim and baseboard scraps I hoarded saved and added some architecture to the door.  This door already had great panels.  It just needed a little more character.

I couldn't believe my ears when it came time to paint it.  He wanted Annie Sloans French Linen!  He is usually a black paint kind of guy.  He likes things to look rich.  I think my primitive cottage look is rubbing off on him :)
This is after I waxed it with clear and dark wax.

I wasn't brave enough to take a pic of his room today.
That will have to come in a later post.
I love the way it turned out!

If you can't find a great door to use try this Simple Headboard idea I found at one of the blog parties a couple of years ago.
Thanks, Pam!

Tuesday, June 18, 2013

Dresser in Linen

I've been wanting to paint this dresser for a long time.  I bought it right after I graduated from high school in 1995.  I finally decided that Annie Sloans' Linen was the color I wanted it to be.
Now before anyone gets too upset that I am painting a lovely wood dresser, I thought I'd share with you some of her blemishes that I've lived with for years.
I covered them up with linens on top of the dresser now I am ready to clothe her in 'Linen' and some dark wax.
I love how the dark wax just enhanced her natural beauty :)
I am really pleased that the hardware looked great against the Linen.
Sigh!
Simple and Lovely!

Monday, June 10, 2013

A New Linen Look and a Tip for Making Your Own Piping

Remember these?
The one chair was a roadside find, and the other was my craft chair.
I am gearing up for some slip covering, but I thought I would try a little reupholstering.  I used a 7 oz. canvas drop cloth.
For this chair back, it was not worth taking out the back vinyl part, so I painted it with AS French Linen.
I then did a white wash over the linen.
For the front of the chairback, I used the old vinyl as a template and then stapled it inside over the existing foam pad. 
I then stapled some batting and drop cloth over the foam on the chair's seat.
Making sure to stretch opposite sides and corners.
For the piping I bought a $1.50 clothesline.
I measured around the edges.
Tore a 2 in. canvas strip, wrapped it around the clothesline, and with a zipper presser foot I sewed and made the piping.
I attached the piping with a staple gun to the bottom of the upholstered seat.
I also stuffed it in along the edge of the chair back and glued it.
They turned out wonderful.
I wanted to make it look like old linen, so using some frog tape and watered down acrylic paints; I made some "linen" stripes.
After it was dried, I ironed over the paint to help it stay in the fabric.
I love them!
Ms. vanity sold at my sale this past weekend, but the lady didn't want a chair.
I really thought either chair would have worked well with her.


Tuesday, September 18, 2012

What I Painted with One Can of Annie Sloan's Chalk Paint

I thought I would do a post to show you all how far a can of Annie Sloans Chalk Paint went for me.  I just used up my can of Duck Egg.  Well, I could probably still paint a picture frame or something small with what is left in the can.

I think people apply paint differently.
 I will share with you how I used this can.  Some projects took one coat while others took two.
*Warning*
There are a lot of pictures in this post.
I wanted this color as an accent color in my bedroom.
So I did just that.
Here I painted a pair of gold medallions that were at the foot of my bed.
I used 2 coats.
I painted a small wood bowl that I use on my dresser to hold odds and ends.  The bowl was a hunter green, so I only painted 1 coat over the hunter green and distressed it to let the dark come through.  You can't tell that it use to be hunter green.
This was a gold picture frame.
I only used 1 coat on this because I also wanted that to come through as I distressed it.
My dresser was the first piece of furniture I painted Duck Egg.  It had laminated type wood on the sides.  I noticed that Chalk Paint spreads really well on shiny surfaces.  I had taken the chipped laminate off of the front of the drawers, so the wood soaked the paint up more on them.  I used 2 coats of paint on this, however I was not so picky about it being totally perfect because I don't like perfect--I like distressed pieces.
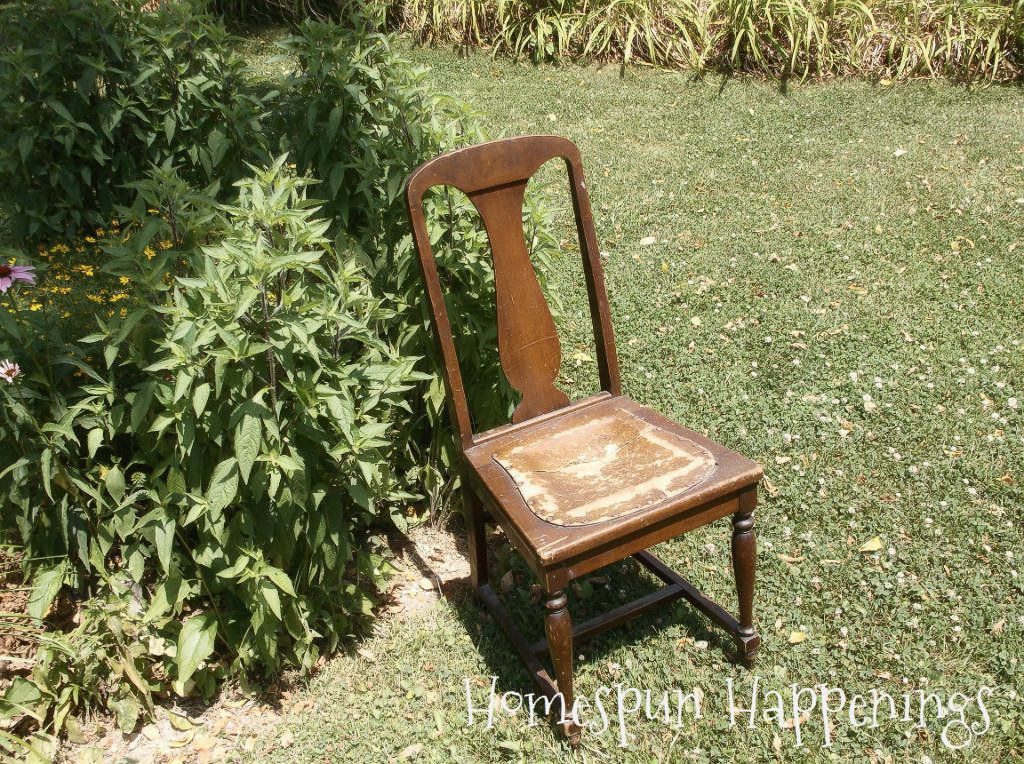
My next furniture piece was this roadside rescue rocker.
It got 2 coats--again not perfect just filled in the center seat and let the edges go with less paint.
Our night stands only got 1 coat of paint because the base was black, and I wanted the black to come through when I distressed them.
Ms. Vanity was hard to paint.  I suggest you don't sand when using Annie Sloans.  I had to sand some bad stuff off of this piece.  The wood just really soaked up the chalk paint.  It took 2 very thick coats of paint.  It was really hard to smooth it out.  I probably should have added some water.
This window took 2 coats of paint, but the paint went far because of the smooth surface.
My final project was these swivel counter chairs.  They had a coat of shiny white paint on them.  I did use 2 coats of Duck Egg, however I still left some white show through.
There ya go.
I feel like I got my money's worth.
If you are very picky about having every inch of furniture painted perfectly and totally covered, you may use more paint than I did.

Linking up With:

My Monday Muse